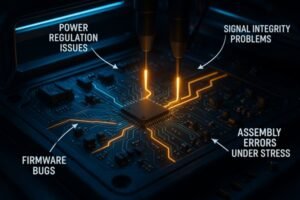
Struggling to budget for your next hardware build? Assembly quotes often arrive with confusing line items and unexpected fees, throwing your entire project's financials into question. Let's decode the key factors so you can budget with confidence.
The final PCB assembly cost is determined by several key factors: the cost of fabricating the bare board, the price of all components on the Bill of Materials (BOM), labor charges for placing components (SMT and THT), one-time engineering setup fees (NRE), and optional testing services.
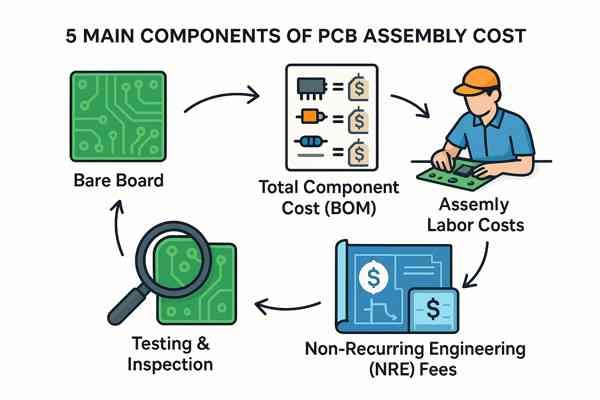
When I manage a project, I always think of the total cost with a simple formula: Total PCBA Cost = Bare PCB Cost + Component Cost + Labor Cost + NRE + Testing. Each part of a quote maps to one of these categories.
Breakdown of PCBA Cost Components
| Cost Component | What It Covers | Key Drivers |
|---|---|---|
| Factor 1: Bare Board | The raw, unpopulated printed circuit board. | Board size, layer count, material (FR-4, Rogers1), surface finish (ENIG). |
| Factor 2: Components | The price of every part on the Bill of Materials (BOM). | Part selection, sourcing markup (for turnkey), order volume. |
| Factor 3: Assembly Labor | The physical work of placing and soldering components. | Number of SMT/THT placements, double-sided assembly, manual steps. |
| Factor 4: NRE2 Setup | One-time setup fees for a new design. | Solder stencil, machine programming, DFM review, test fixture development. |
| Factor 5: Testing & QA | Optional services to verify board quality. | AOI, X-ray inspection, In-Circuit Test (ICT), Functional Test (FCT). |
Getting a handle on your PCB assembly costs is crucial for any hardware project. It's not just about finding the cheapest supplier; it's about understanding the cost drivers so you can make smart design trade-offs. If you don't know what impacts the price, you could be overpaying or, worse, designing a product that's too expensive to manufacture at scale. Let’s break down each element so you can forecast your budget accurately and optimize your design for cost-effectiveness from the start.
What is the average cost for PCB assembly?
Need to create a budget but have no idea what assembly will cost? Without a realistic baseline, you risk underfunding your project or getting a major shock when the first quotes arrive. Let's look at concrete examples to ground your expectations.
There is no single "average" cost. A simple prototype (e.g., 50x50mm, 2-layer, 30 components) might cost $10-$30 per unit for a small batch. A complex board (e.g., 150x100mm, 8-layer, 500+ components, BGA) can easily exceed $500 per unit in low volumes.
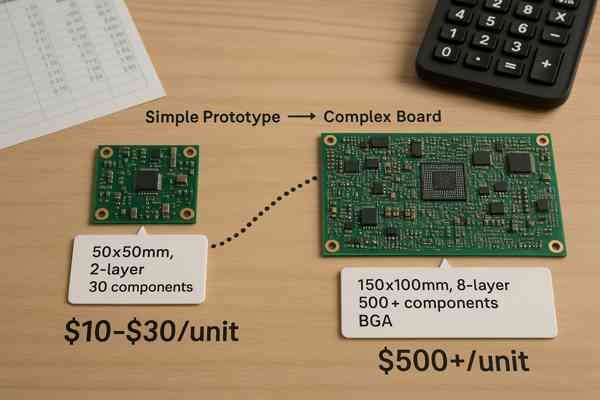
Giving a single average cost is impossible, as it depends entirely on complexity and volume. Instead, let's look at a few practical examples for a typical prototype run of 10 units with a full turnkey service.
Example Prototype Cost Scenarios (Batch of 10 Units)
| Board Type | Specifications | Estimated Cost Per Unit | Key Cost Drivers |
|---|---|---|---|
| Simple IoT Sensor 🛰️ | 2-Layer, 40x60mm FR-4, ~25 SMT components, no THT, HASL finish. | $20 - $40 | Low component count, simple 2-layer board. NRE fee is the main cost factor. |
| Mid-Complex Controller 🎛️ | 4-Layer, 100x80mm FR-4, ~150 SMT components, a few THT connectors, ENIG finish. | $90 - $150 | Increased layer count, higher component count, and the mix of SMT/THT labor. |
| High-End Computing Board 💻 | 8-Layer, 150x120mm, controlled impedance, 1 BGA, ~500 components, ENIG finish. | $400 - $700+ | Expensive 8-layer fab, high component cost, BGA placement, and mandatory X-ray inspection. |
It's critical to remember these are prototype prices. When moving to mass production (e.g., 10,000+ units), the per-unit cost can drop by 50-80% as NRE costs are fully amortized and you benefit from massive economies of scale in both board fabrication and component purchasing.
How do component choices and the Bill of Materials (BOM) affect assembly cost?
Is your Bill of Materials secretly inflating your project's budget? Every single part number, from the main processor to the cheapest resistor, adds up and can introduce production risks. Understanding these impacts is the first step to optimizing your BOM for cost.
Your Bill of Materials (BOM) directly impacts cost through component prices, sourcing fees, and handling requirements. Expensive, rare, or hard-to-place parts will significantly increase the total assembly price. A clean, accurate BOM reduces manual work and sourcing errors, lowering costs.
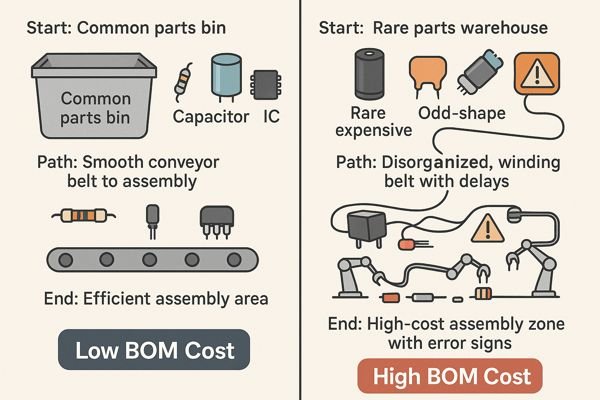
The BOM is more than just a parts list; it's a financial blueprint for your product. Every choice has a cost implication. During the Tuxedo Keypad project at Honeywell, we faced a major Wi-Fi module shortage. Finding, qualifying, and redesigning for a new module that met performance and compliance standards cost us weeks of engineering effort, showing how availability is just as important as price.
Impact of Component Selection on Cost
| Component Choice | Low-Cost Approach 👍 | High-Cost Approach 👎 | Why It Matters |
|---|---|---|---|
| Sourcing | Standard, multi-source parts | Sole-sourced or obscure parts | Availability issues cause delays and require costly redesigns. |
| Packaging | Common SMT (0402, 0603) | Ultra-fine pitch (0201, 01005), BGA | Requires more precise machinery, slower assembly, and more expensive inspection. |
| Attrition | Account for standard overages | Not providing enough extra parts | Production stops if the assembler runs out of a component. You pay for the delay. |
| Lifecycle | Active, in-production parts | Near End-of-Life (EOL) parts | EOL parts force expensive last-time buys or immediate redesigns. |
How do fine-pitch components or Ball Grid Arrays (BGAs) increase assembly costs?
Need to use a BGA to meet size and performance goals? Be prepared for the sticker shock on your assembly quote, as these parts introduce a new level of complexity and cost. Let’s break down exactly where those extra charges come from.
Fine-pitch parts and BGAs increase costs due to stricter requirements: more expensive solder stencils, higher precision pick-and-place machines, mandatory 3D Automated Optical Inspection (AOI) or X-ray inspection for quality control, and a higher potential for yield loss and rework.
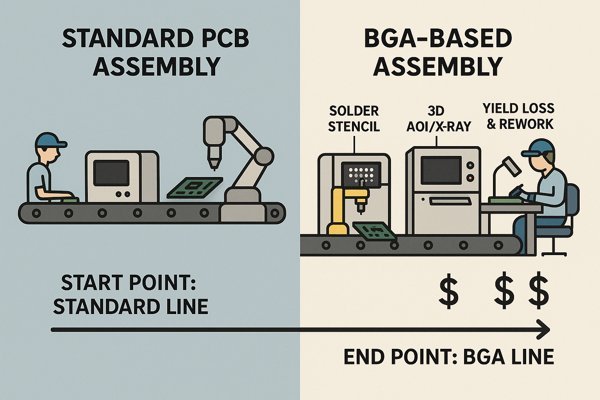
Using BGAs or fine-pitch QFNs is often a necessity for modern designs, but you have to budget for the associated assembly costs. It's not just about placing the part; it's a completely different level of process control. At Lightelligence, debugging the evaluation board involved a large BGA. Reworking it required a specialized station and an operator certified to standards like IPC-7711/77213 (Rework, Modification, and Repair of Electronic Assemblies). This is a highly skilled job, and the cost reflects that expertise.
BGA vs. Standard Component Process Costs
| Process Step | Standard Components | BGA Components | Cost Impact |
|---|---|---|---|
| Solder Stencil | Standard chemical-etched (~$100) | Laser-cut, electropolished (~$250+) | Higher precision is needed for smaller apertures. |
| Placement | Standard Machine | High-accuracy machine (\(\pm 25 \mu\text{m}\)) | Slower, more precise placement increases labor time. |
| Inspection | Standard 2D AOI (often included) | Mandatory X-ray Inspection | X-ray adds a flat fee ($50-$150+) per run. |
| Rework | Simple (hot air gun) | Specialized BGA rework station | A single BGA rework can cost $100-$300 due to equipment and skill. |
How does the PCB board itself impact the total price?
Focusing only on component costs while ignoring the board itself? The price of your bare PCB can quietly double or triple your total fabrication cost if you make the wrong choices. Let's examine the board features that have the biggest price impact.
The PCB itself is a significant cost driver. Key factors include its physical size, the number of layers, the base material (e.g., FR-4 vs. Rogers), copper weight, minimum trace/space requirements, and the surface finish (e.g., HASL vs. ENIG).
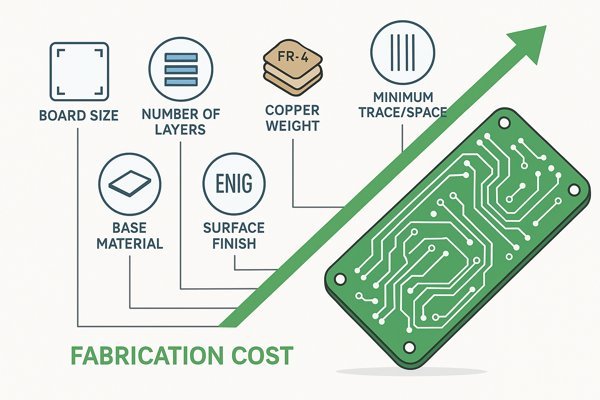
When you get a quote, the fabrication of the bare board is a separate line item. Engineers often focus on the circuit design and forget how these physical board characteristics add up.
PCB Fabrication Cost Drivers
| Factor | Standard (Low Cost) | Premium (High Cost) | Cost Impact |
|---|---|---|---|
| Layers & Vias | 2/4 Layers, Through-hole Vias | 8+ Layers, Blind/Buried Vias | Each layer pair and advanced via type adds complex processing steps. |
| Material | Standard FR-4 (for circuits \(<1 \text{ GHz}\)) | Rogers, Isola, Polyimide | High-frequency or flexible materials can be 5-10x more expensive. |
| Surface Finish4 | HASL | ENIG, ENEPIG, Hard Gold | ENIG is ~10-15% more expensive but needed for BGAs and fine-pitch parts. |
| Tolerances | \(\ge 5 \text{ mil trace/space}\) | \(< 4 \text{ mil trace/space}\) | Tighter tolerances require advanced equipment and reduce manufacturing yield. |
What is the cost difference between Surface Mount (SMT) and Through-Hole (THT) assembly?
Do you still have through-hole parts on your modern SMT board? While necessary for some components like connectors, each THT pin adds significant manual labor costs that can inflate your budget. Let's quantify the price difference between these two technologies.
Surface Mount Technology (SMT) is highly automated and generally cheaper for high-volume production. Through-Hole Technology (THT) often requires manual insertion or selective soldering, making it significantly more expensive per placement, sometimes costing 5 to 10 times more per pin.
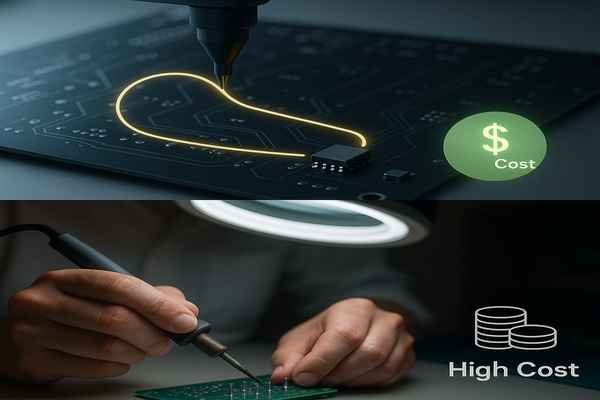
The cost difference comes down to automation versus manual labor. For mixed-technology boards, after the SMT components are reflowed, THT parts are inserted manually and then soldered using a time-consuming manual process or an automated selective wave soldering5 machine. This extra process step adds significant cost.
SMT vs. THT Cost Comparison
| Technology | Process | Typical Cost Per Pin/Pad | Primary Advantage |
|---|---|---|---|
| SMT Assembly | Automated placement, reflow soldering | $0.01 - $0.03 | Speed and Density |
| THT Assembly | Manual insertion, wave/selective soldering | $0.05 - $0.15 | Mechanical Strength |
How does order quantity affect the per-unit assembly cost?
Ordering just a few prototypes and shocked by the high per-unit price? This is a common experience, driven by the powerful relationship between fixed costs and production volume. Let's explore how ordering more units dramatically lowers your price.
Order quantity drastically affects per-unit cost due to economies of scale. Setup fees (NRE) are spread across more units, material costs decrease with bulk purchasing, and production line efficiency increases, significantly lowering the price per board for larger orders.
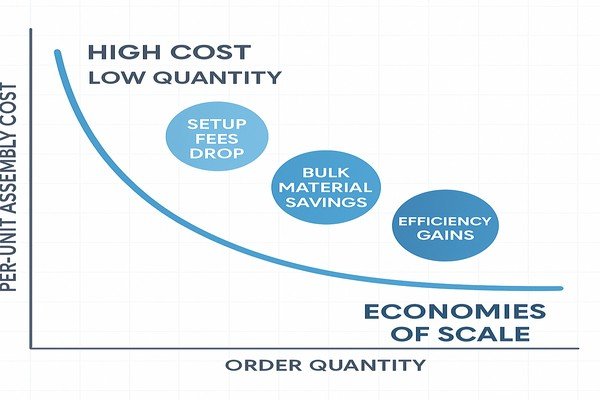
This is one of the most fundamental principles of manufacturing. The cost to produce one unit is always much higher than the average cost to produce one thousand units.
How Volume Lowers NRE Impact
Every new assembly job requires setup. If your total NRE cost is $500 and you order 10 boards, you're adding $50 of NRE cost to each board. If you order 1,000 boards, that same $500 NRE adds only $0.50 to each board. The impact of these fixed costs diminishes rapidly as volume increases.
How Volume Creates Economies of Scale
Variable costs also decrease with volume. Component suppliers offer significant price breaks for higher quantities. A microcontroller might cost $8 in single units but only $5 when you buy a reel of 1,000. Your assembly house also becomes more efficient with larger runs, lowering the effective labor cost per board.
What are Non-Recurring Engineering (NRE) costs in PCB assembly?
Seeing an "NRE" or "Setup Fee" on your quote and wondering what it's for? These one-time charges can seem like a mystery, but they cover the critical upfront work needed to build your board correctly. Let's clarify what you're actually paying for.
Non-Recurring Engineering (NRE) costs are one-time fees charged by an assembly house to prepare for manufacturing your specific board. This includes tooling for the stencil, programming for pick-and-place machines, and engineering time for DFM review and process setup.
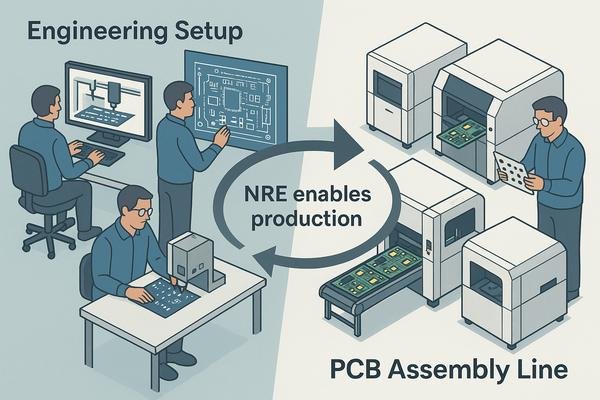
NRE is the upfront investment the manufacturer makes to get ready to build your product. It's called "non-recurring" because you typically only pay it once for a specific board revision.
Common NRE Charges
| NRE Item | Description of the Setup Work | Typical Cost |
|---|---|---|
| Solder Paste Stencil | A custom steel sheet is created for applying solder paste to SMT pads. | $100 - $400 |
| Machine Programming | Engineers set up pick-and-place machines with your component location and orientation data. | $50 - $300 |
| DFM Review | An engineer checks your design files for manufacturability issues before production. | Often included in setup fees. |
| Test Fixture | A custom "bed-of-nails" jig or test rig is built for automated testing (ICT/FCT). | $500 - $30,000+ |
How much does testing and inspection (e.g., AOI, X-ray) add to the total cost?
Tempted to skip extra testing to save a few dollars? This can be a costly mistake, as catching a single error in production saves thousands in field returns and debugging time. Let's review the testing options and their value.
Basic Automated Optical Inspection (AOI) is often included in the assembly price. However, more advanced testing adds cost. For example, X-ray inspection can add $50-$150 per run, while a full functional test could add anywhere from $1 to $50 per board, depending on its complexity.
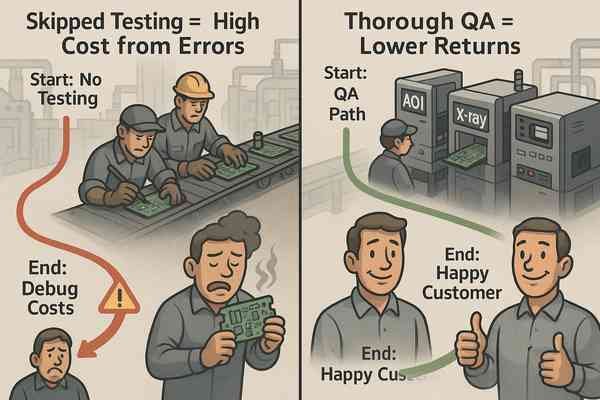
Testing is not a one-size-fits-all service. The cost depends entirely on the level of validation you need. For the medical infusion pumps I developed at Smiths Medical, 100% FCT was mandatory to verify motor control, sensor readings, and all alarms, ensuring patient safety.
Quality Assurance Options and Costs
| Test Method | What It Checks | Best For | Typical Cost |
|---|---|---|---|
| AOI6 | SMT component presence, orientation, solder shorts. | Standard on all SMT lines. | Often included. |
| X-ray7 | BGA/QFN solder joints, shorts, voids. | Boards with bottom-terminated packages. | $50 - $150+ NRE fee. |
| ICT8 | Individual component values, shorts/opens network. | High-volume production. | High NRE ($5k+), low per-unit cost. |
| FCT9 | Powers up board and verifies real-world operation. | Mission-critical products. | Medium NRE ($500+), variable per-unit cost. |
How can PCB assembly costs be reduced?
Worried your design is too expensive to build? High assembly costs can kill a project's profitability before it even launches. Fortunately, there are several engineering strategies you can use to significantly cut down the price.
To reduce assembly costs, simplify your design by using fewer components, choosing standard parts, and avoiding overly dense layouts. Panelize small boards, provide a clean and complete data package (Gerber, BOM, Centroid), and discuss your design with your manufacturer early.
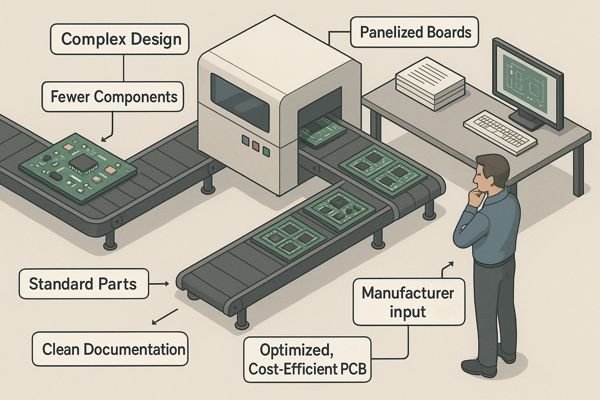
Cost reduction isn't about cutting corners; it's about smart, efficient engineering. A great strategy for complex products is to consider a System-on-Module (SoM). This offloads the most complex assembly (processor, RAM) to a pre-built module, allowing you to design a simpler, cheaper carrier board.
Cost Reduction Strategies
| Strategy | Action Item | Potential Cost Impact |
|---|---|---|
| Optimize the Layout | Place components on only one side of the PCB. Panelize small boards. | High |
| Simplify the Components | Use common packages (0402/0603). Minimize THT components. | High |
| Integrate Functions | Reduce component count by integrating functions into an MCU or IC. | Medium |
| Improve Data Quality | Provide a perfect, machine-readable BOM and Centroid file to avoid manual correction fees. | Medium |
| Use a SoM | Offload complex CPU/DDR layout to a pre-certified module. | High (for complex systems) |
How can the Bill of Materials (BOM) cost be reduced?
Are a few expensive components eating up your entire budget? The price of your parts is often the single largest cost driver, but it's also one of the most controllable. Let's look at tactical ways to lower your BOM cost.
To reduce BOM cost, replace expensive components with lower-cost alternatives that still meet specifications. Consolidate part numbers to increase volume discounts, and avoid single-source or hard-to-find components. Regularly review your BOM for cost-reduction opportunities.
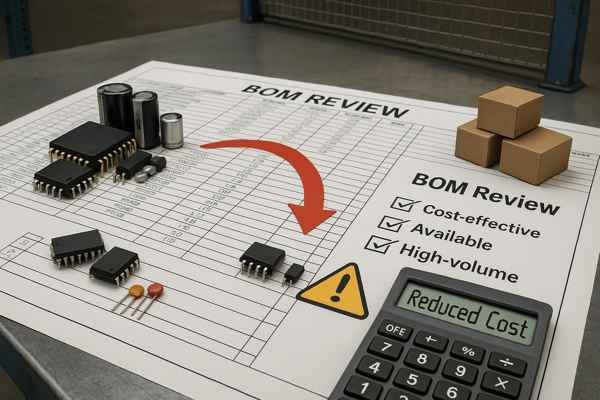
At Honeywell, we had dedicated cost-reduction projects for high-volume products. The BOM was always the first place we looked for savings. It's where a huge portion of the product cost resides.
BOM Cost-Down Tactics
| Tactic | How to Implement It | Potential Savings |
|---|---|---|
| Find Alternative Parts | Search for pin-compatible parts from different manufacturers that are cheaper. | High |
| Consolidate Values | Instead of using \(4.7 \text{ k}\Omega\), \(5.1 \text{ k}\Omega\), and \(5.6 \text{ k}\Omega\) resistors, use \(4.7 \text{ k}\Omega\) for all if the design allows. | Medium |
| Relax Tolerances | Use 5% tolerance resistors instead of 1% in non-critical parts of a circuit. | Medium |
| Avoid Sole-Sourcing | Select parts that have at least one or two drop-in replacements to maintain pricing leverage. | High |
What is the difference between turnkey and consignment PCB assembly services?
Unsure whether to buy parts yourself or let your assembler handle it? This decision creates a major fork in the road for your project's logistics, workload, and risk. Let's compare the assembly models so you can choose the right path.
In turnkey assembly, the manufacturer handles everything: they fabricate the PCB, source all components, and assemble the board. In consignment assembly, you (the customer) purchase and provide all the components to the manufacturer, who only handles assembly.
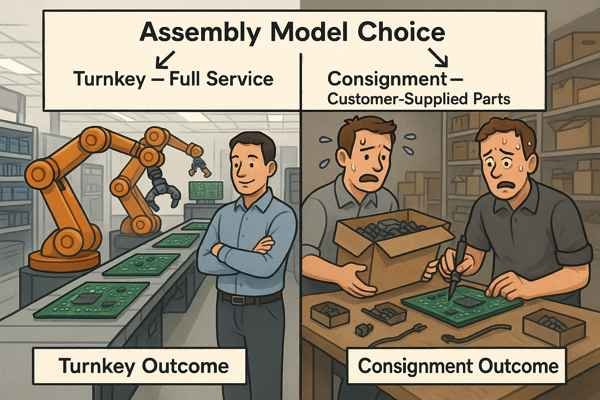
Choosing between these two models depends on your priorities and resources. There's also a third, hybrid option that is often the most practical.
Comparison of Assembly Models
| Aspect | Full Turnkey | Partial/Hybrid Model | Full Consignment |
|---|---|---|---|
| Your Effort | Low (You provide files) | Medium (You source key parts) | High (You source all parts) |
| Final Cost | Highest (Includes markup) | Medium | Lowest (No markup) |
| Your Control | Low (Rely on assembler) | Medium (Control key parts) | High (Full control) |
| Your Risk | Low (Assembler owns sourcing) | Medium (You own some risk) | High (You own all risk) |
| Best For | Prototypes, busy teams | Cost-optimizing production | High-volume, expert teams |
Which PCB assembly service is best for low-volume prototypes?
Need to get just a few boards built for testing, fast? Choosing the wrong partner can lead to long delays, high costs, and poor quality, derailing your development schedule. Let's build a checklist for selecting the right prototype supplier.
For low-volume prototypes, the best service is a full turnkey provider that specializes in small batches and offers an online, instant quoting platform. These services are optimized for speed and convenience, combining PCB fabrication, component sourcing, and assembly into one seamless process.
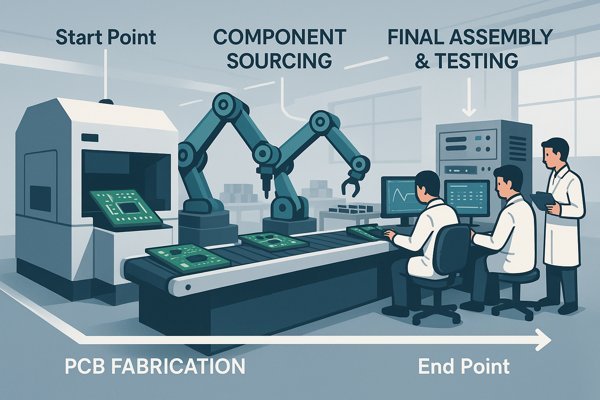
When you only need 5 or 10 boards, your priorities are speed and convenience, not shaving fractions of a cent off the unit price. The traditional assembly houses that cater to large corporations are often a poor fit.
Checklist for a Prototype Supplier ✔️
| Feature to Look For | Why It's Important for Prototyping |
|---|---|
| Full Turnkey Service | A single point of contact saves immense time and avoids logistical errors. |
| Instant Online Quote | Allows for rapid budget estimates and design trade-off analysis. |
| No Minimum Order Quantity | Ensures you aren't penalized for ordering small, prototype quantities. |
| Fast Turnaround Options | Look for 5-10 day options to accelerate your development cycle. |
| Reputable Part Sourcing | Confirms they use authorized distributors (e.g., Digi-Key, Mouser) to avoid counterfeit parts. |
| Accessible Engineering Support | DFM feedback before production can prevent a costly failed prototype run. |
Conclusion
Understanding the factors that drive PCB assembly cost is essential for any hardware engineer. By managing your BOM, making smart design choices, and selecting the right manufacturing partner, you can control your budget effectively.
-
Learn why Rogers materials are chosen for high-frequency PCBs and how they impact performance, cost, and design decisions in electronics manufacturing. ↩
-
Learn how NRE fees impact your PCB project costs and why understanding them can help you budget more accurately for new designs. ↩
-
Understanding IPC-7711/7721 certification is crucial for ensuring quality in electronic assembly, especially for complex components. ↩
-
Learn how various PCB surface finishes like HASL, ENIG, and ENEPIG affect performance, reliability, and cost to make informed design choices. ↩
-
Understanding selective wave soldering can help you grasp its advantages and cost implications in PCB assembly. ↩
-
Learn how AOI (Automated Optical Inspection) ensures quality in PCB assembly and why it's a standard process in modern electronics manufacturing. ↩
-
Explore how X-ray inspection enhances quality control in PCB manufacturing, ensuring reliability and performance. ↩
-
Learn about ICT's importance in verifying electronic components, crucial for maintaining high production standards. ↩
-
Learn how FCT ensures your circuit boards work as intended by simulating real-world operation, crucial for mission-critical products. ↩


